

Do You Need a Primer Before Painting a Miniature?
4 min read
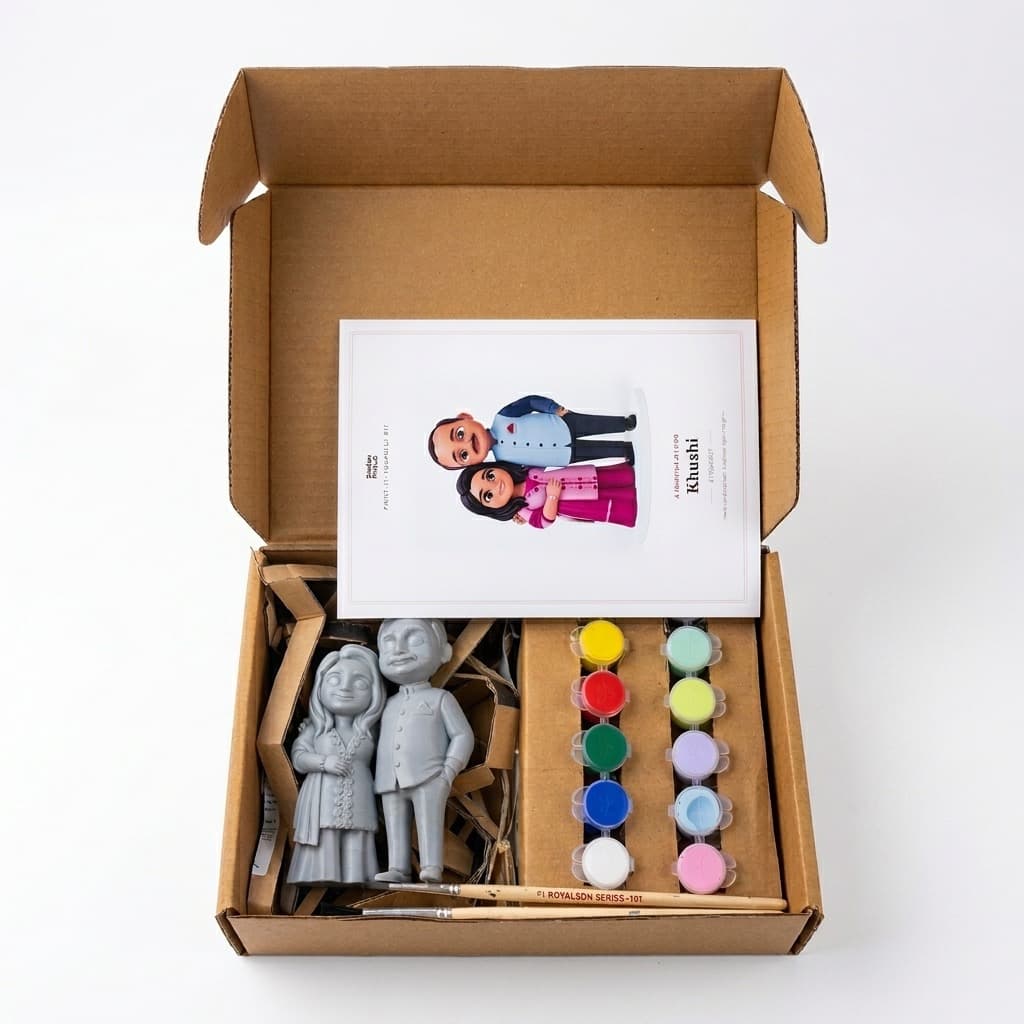
Short answer: sometimes, and it depends almost entirely on what the miniature is made of, not on how careful you plan to be with the brush. Skip primer on a material that needed it, and you'll usually find out within a day or two, when a fingernail or a sleeve catches the paint and it lifts off in a flake rather than a scratch.
Acrylic paint bonds to a surface mechanically, by gripping into microscopic texture, not by chemically fusing to it. Cast resin and injection-moulded plastic are both smooth enough that paint has almost nothing to hold onto, which is why it can peel off in sheets even from a careful paint job. Primer's whole job is to put a very thin layer of texture on that smooth surface for the paint to actually grab.
Raw resin and metal miniatures need it close to always. Both have a slick, semi-glossy surface straight off the mould, and paint that goes straight onto either one is paint that's going to chip. Injection-moulded plastic kits are the same story, just slightly less severe.
This is exactly why we 3D-print our own figurines in high-quality resin rather than plastic filament: resin holds far finer detail, but that same smooth, semi-glossy surface is precisely the kind that fights a coat of paint. So every figurine we ship goes through a two-coat primer process before it leaves our studio, not one dusting. The first coat is a true base colour and a first pass of grip; the second closes any spot the first missed, since resin's surface is unforgiving of a single thin coat the way a rougher material isn't. If you're painting a figure that didn't come with primer already applied, a quick check is worth doing before you decide either way: run a fingernail firmly across a hidden spot on the raw piece. If it feels glassy-smooth with no drag at all, prime it, and on resin specifically, plan on two coats rather than one.
The scratch test
Run a fingernail across a hidden part of the unpainted piece. Glassy and slick means prime it first. Any texture at all, and paint will likely hold on its own.
The one mistake that undoes the whole point of priming is putting on too much at once. A heavy coat fills in fine sculpted detail, exactly the thing primer is supposed to protect, and takes far longer to dry evenly.
One more thing worth knowing: primer isn't optional armour against every painting mistake. It fixes adhesion, not technique. If paint is still going on too thick or bleeding past where you want it, that's a brush-control issue primer won't touch, and our common painting mistakes piece covers those separately.
On a smooth resin or metal piece, skipping it usually means the paint chips within days, so it's not really a shortcut. The scratch test above will tell you how bad the gap is for whatever you're painting, but on resin specifically, budget for it rather than hoping to skip it.
White or light grey for anything you're painting in bright or light colours, since a dark base underneath will dull them. Black or dark grey only if most of your palette is already dark, since it can make lighter colours harder to get opaque.
If the kit says priming is handled, no. Ours ships already through a two-coat primer process for exactly this reason, since it's 3D-printed in resin, so the paint pots go straight onto the figure. If you're not sure whether yours was, the scratch test settles it in a few seconds.
Painting & Together-Time
A wrong colour or a smudged line on a half-painted figurine feels final. It almost never is. Here's how to actually rescue it.
4 min read
Painting & Together-Time
A kit gives you paint and brushes. Here's the short, cheap list of everyday things you'll also want on the table before you start.
4 min read
Painting & Together-Time
The parts nobody mentions beforehand: how long it really takes, what goes wrong halfway through, and why the crooked bits end up mattering.
4 min read