

How to Paint a Figurine at Home: A Beginner's Guide
6 min read
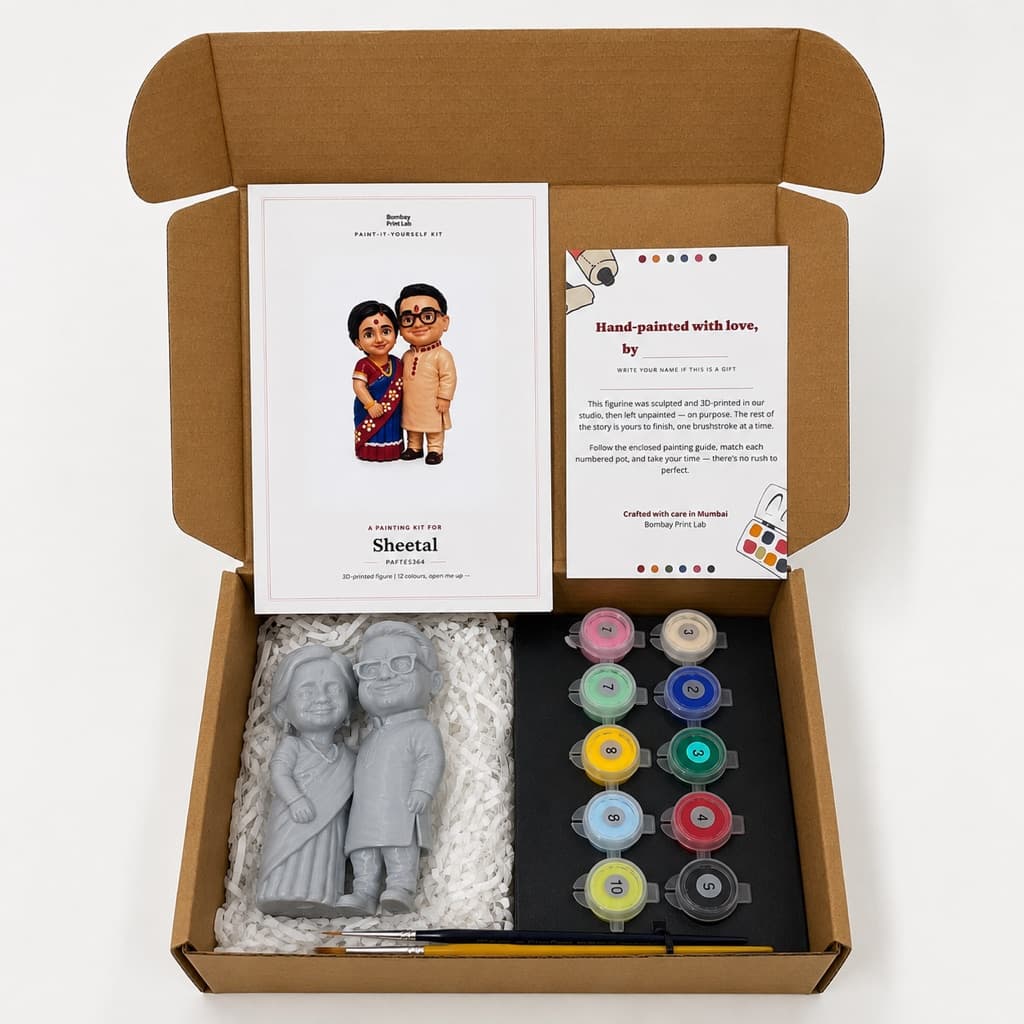
The most common thing people tell us before painting their first figurine is some version of "I'm not good at this," usually followed by a story about a school art class that went badly twenty years ago. It doesn't matter. Painting a figurine has almost nothing in common with drawing or freehand art: it's closer to colouring inside the lines with a slightly harder tool, and the couple of real skills involved are learnable in about ten minutes.
This is the part people skip and then regret. Painting in the wrong order is where most beginner mistakes come from, not shaky hands.
If you're painting a kit with a numbered guide
Numbered guides exist for exactly this reason: they've already worked out the order for you, pot by pot, so you're not guessing what to paint first. Follow the numbers in order even if a later colour looks easier; the sequence is designed around drying time and layering, not difficulty.
Faces intimidate people more than anything else on a figurine, mostly because a bad face is the most noticeable mistake on the whole piece. Two things help enormously: paint the eyes as small dots with the tip of your smallest brush rather than trying to "draw" them, and paint skin in at least two thin coats rather than one thick one: a single thick coat of skin-tone paint almost always looks uneven once dry, while two thin coats look smooth and even.
If you're painting with a partner, a kid, or a parent, split the work by area rather than by figure: one person does base colours across the whole piece while the other handles details, rather than each person painting a separate half. It tends to produce a more even result and, more to the point, means you're both looking at and talking about the same thing the whole time instead of working in parallel silence. We wrote more on this angle specifically in our date night painting ideas piece, if that's the context you're doing this in.
If you ordered a figurine from us, your guide already has this worked out: the numbered pots follow the right paint order, and the mobile walkthrough shows one colour at a time so you're never staring at the whole figure wondering where to start.
No. Figurine painting is closer to colouring inside pre-defined shapes than freehand art, and the few real skills (thin coats, correct order, patience between layers) take about ten minutes to learn and improve with practice within the same sitting.
Painting areas in the wrong order and not letting layers dry between colours. Both cause muddy, blended results that look like a skill problem but are actually a sequencing problem; fixable by slowing down, not by being more careful with the brush.
A single figure with a handful of colours usually takes one to two hours for a first-timer, spread across letting layers dry. A more detailed piece, or painting with someone else and taking your time, can comfortably fill an evening.
Painting & Together-Time
A wrong colour or a smudged line on a half-painted figurine feels final. It almost never is. Here's how to actually rescue it.
4 min read
Painting & Together-Time
A kit gives you paint and brushes. Here's the short, cheap list of everyday things you'll also want on the table before you start.
4 min read
Painting & Together-Time
The parts nobody mentions beforehand: how long it really takes, what goes wrong halfway through, and why the crooked bits end up mattering.
4 min read